Configuring X509 Certificate authenticator in WSO2 Identity Server

What is X509 Authentication?
Authentication is the process of verifying that a user is who they say they are. Certificate based authentication helps clients to authenticate themselves using their client certificate instead of username and password. Certificate based authentication offers stronger security by mutually authenticating both the client, using a trusted party (the Certificate Authority (CA)) and the server during the TLS handshake. X.509 is a standard defining the format of public key certificates. X.509 certificates are used in many Internet protocols, including TLS/SSL, which is the basis for HTTPS.
A X509 certificate can have different fields such as:
- Version
- Serial Number
- Signature Algorithm Identifier
- Issuer Name
- Validity Period
- Subject Name
- Public Key Information
- Issuer Unique ID
- Subject Unique ID
You can view certificates using KeyStore Explorer tool

How X509 Authentication works?

Keystore is a repository where where own private keys, certificates and symmetric keys can be stored.
Truststore is a repository which stores certificates from trusted Certificate authorities(CA) which are used to verify certificate presented by Server in SSL Connection
A SSL Client has a keystore and a truststore and also SSL Server has a keystore and a truststore. (Client will have its certificate in its keystore and server’s certificate in its truststore. Similarly Server will have its certificate in its keystore and client’s certificate in its truststore. )
- Initially the SSL Client will send a “Hello” message to the SSL Server and request the server to send the certificate.
- Server will send its certificate from its keystore.
- Then the client will verify the server’s certificate. The server’s certificate should be stored in the client’s truststore. So the client will verify the server’s certificate.
- Later the client will send its certificate from its keystore.
- The SSL Server will authenticate client using the client’s certificate through the server’s truststore.
- Now Mutual SSL connection can be established in between the client and server.

Configuring X509 Certificate based Authentication with WSO2 Identity Server 5.7.0
To try X509 Authentication with IS 5.7.0 using travelocity sample, we need to follow the following steps.
- Create a self-signed certificate for the client
- Import the client certificate in the browser
- Configure X509 Certificate for the client app in WSO2 Identity Server
- To test the X509Authenticator, Deploy travelocity sample in tomcat and sign in to the travelocity using X509 Authentication
Let’s see those steps in details.
1.Create a self-signed certificate for the client
1.1 Run the following OpenSSL command to generate your private key and public certificate. Answer the questions and enter the Common Name when prompted.
openssl req -newkey rsa:2048 -nodes -keyout key.pem -x509 -days 365 -out client.pemCountry Name (2 letter code) [AU] : SL
State or Province Name (full name) [Some-State]:Western
Locality Name (eg, city) [ ]:Colombo
Organization Name (eg, company) [Internet Widgits Pty Ltd]:WSO2
Organizational Unit Name (eg, section) [ ]:QA
Common Name (e.g. serverFQDN or YOUR name) [ ]: wso2is.com
Email Address [ ]:piraveena@wso2.com
1.2 Review the created certificate:
openssl x509 -text -noout -in client.pem1.3 Combine your key and certificate in a PKCS#12 (P12) bundle:
openssl pkcs12 -inkey key.pem -in client.pem -export -out client.p121.4 Validate your P12 file.
openssl pkcs12 -in client.p12 -noout -info1.5 Import the certificate to the WSO2 IS truststore
keytool -importcert -alias localcrt -file client.pem -keystore ${IS_HOME}//Users/piraveena/Documents/issue/wso2is-5.7.0/repository/resources/security/client-truststore.jks -storepass wso2carbon -noprompt2.Import the certificate into browser
In Mozilla Firefox, go to preferences >> privacy >> certificate >> view certificate >> import
Import the PKCS#12 (P12) format of the certificate.
3. Configure the X509 certificate for the client app in WSO2 IS 5.7.0
3.1 Update connector 9443 by adding the truststore path and password of the IS server as mentioned below (Else you can create a new connector and use that . Refer [1] for creating a new connector. ) Go to <IS_HOME>/repository/conf/tomcat/catalina-server.xml and add truststore path and password.
<Connectorprotocol=”HTTP/1.1"port=“9443” maxThreads=”200"scheme=”https” secure=”true” SSLEnabled=”true”keystoreFile=”${carbon.home}/repository/resources/security/wso2carbon.jks”keystorePass=”wso2carbon”truststoreFile=”${carbon.home}/repository/resources/security/client-truststore.jks”truststorePass=”wso2carbon”clientAuth=”want” sslProtocol=”TLS”/>
3.2 Configure the authentication endpoint in application-authentication.xml in <IS_HOME>/repository/conf/identity
If you are using a 9443 connector, then update the authentication endpoint as https://localhost:9443/x509-certificate-servlet
<AuthenticatorConfig name=”x509CertificateAuthenticator” enabled=”true”><Parameter name=”AuthenticationEndpoint”>https://localhost:9443/x509-certificate-servlet</Parameter><Parameter name=”username”>CN</Parameter></AuthenticatorConfig>
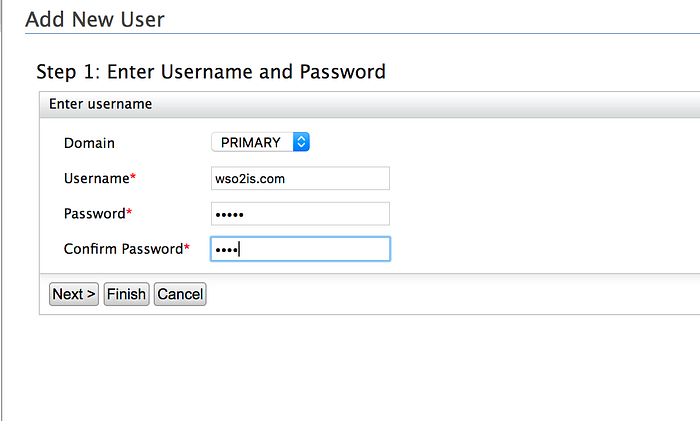
3.3 Create a user using management console where the user name should match with the CN of the certificate of the client
User name should be wso2is.com (CN name As given in the client certificate)3.4 Go to certificate-validation.xml in <IS_HOME>/repository/conf/security/ and disable CRLValidator and OCSPValidator
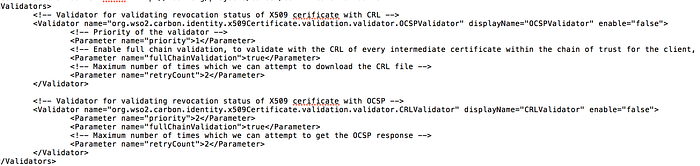
3.5 . Go to the registry through Carbon management console
/_system/governance/repository/security/certificate/validator/ocspvalidator and /_system/governance/repository/security/certificate/validator/crlvalidator
and disable them.
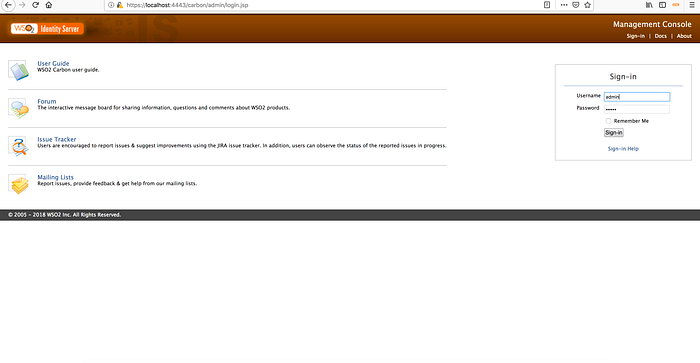
3.6 Run the Identity Server and Sign in to management console (https://localhost:9443/carbon/)(Configure it in the service provider as mentioned in this doc [1])
username:adminpassword:admin
3.6 Create a user wso2is.com (Name used as CN)
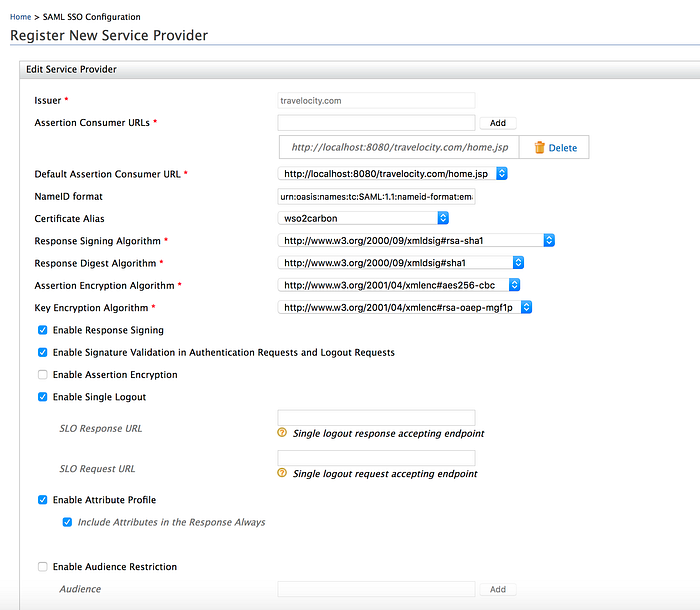
3.7 Register Travelocity sample as service provider
Add tavelocity.com as the Service provider

Go to Inbound Authentication > SAML2 Web SSO Configuration and add the following details.
Go to Local & Outbound Authentication Configuration and add the following details.
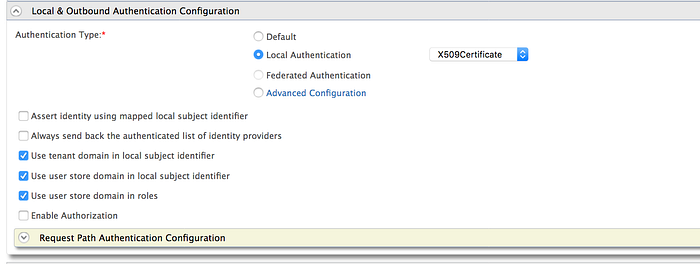
Now X509 Authenticator has been configured!
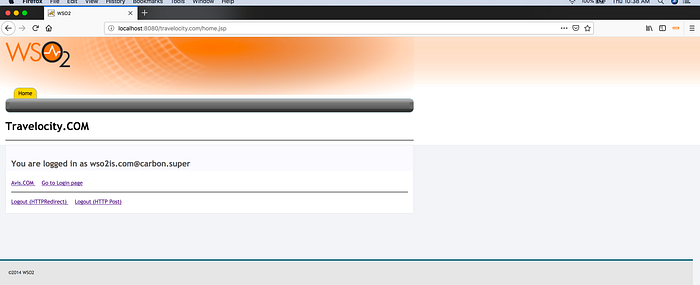
4.To test the X509Authenticator, Deploy travelocity sample app
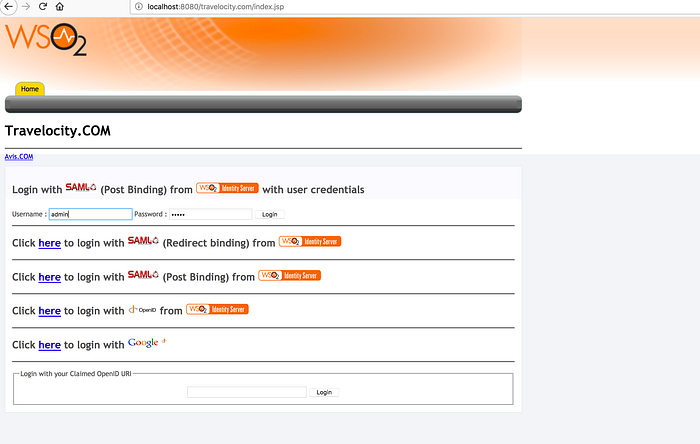
4.1 Go to http://localhost:8080/travelocity.com and you will be prompted with the client certificate you added. Click OK button

4.2 Sign in using admin credentials (username: admin, password: admin)